


Introduction
HarePoint Workflow Extensions for Office 365 significantly improves the automation capabilities in SharePoint Online making almost any task achievable.
In this article, we will review how to automate sending personalized emails using the workflows empowered with HarePoint Workflow Extensions for Office 365.
Scenario
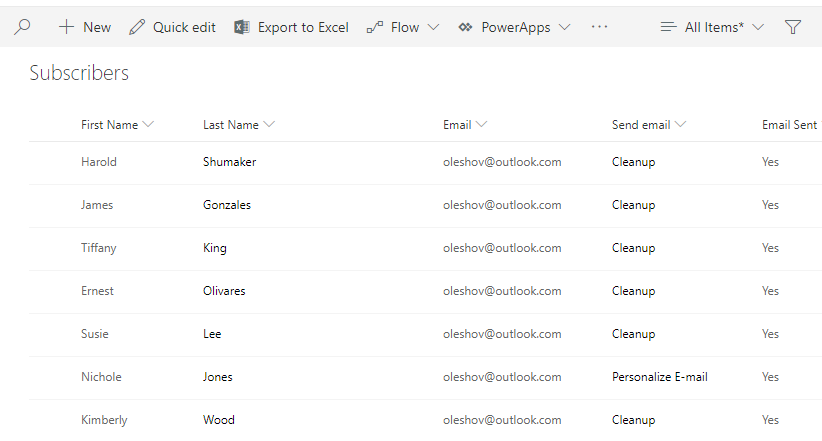
We have all the subscribers listed in a Subscribers list. The task is to send personalized emails to these (all or only specific) subscribers.
The list contains subscribers’ data, such as first and last name, email address (but there can be more). There can also be attachments for each subscriber – invoices, coupons, agreements or anything else – these attachments will be sent in an email as well.
There is a special Email sent field in the list that is used as a flag to manage sending emails.
The automation will be based on two workflows:
- Send email workflow – a list workflow associated with Subscribers list, configured to trigger on item change. Creates a personalized email and sends it to a single specific subscriber.
- Mail merge initiator workflow – a site workflow that runs through all items in Subscribers list and modifies all (or only specific) items, which in turn initiates Send email workflow instances for each of the changed items.
These workflows are described in details below.
The first workflow: ‘Send email’ list workflow

Let’s review the workflow stages in more details.
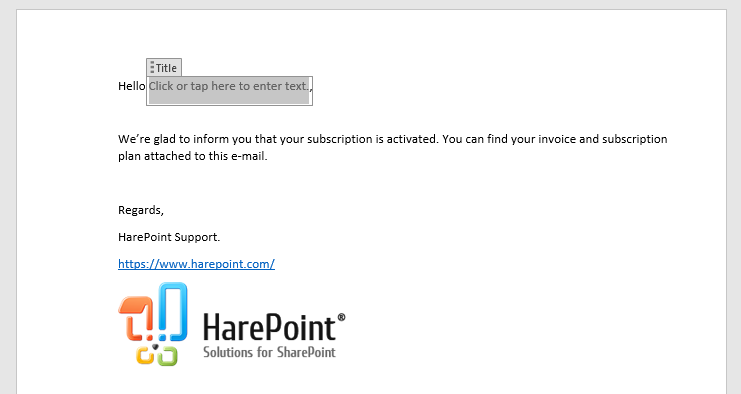
Personalize E-mail stage creates a personalized email based on a Word document template. This template contains content control fields that can be updated from a workflow. In this example, there is only one content control field (for the subscriber name), but there can be as many as you need:
The Word document (template) is stored in a document library:
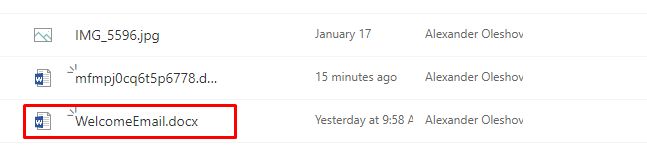
The workflow generates a random name for a personalized document and then copies the template to the same document library with this random name:

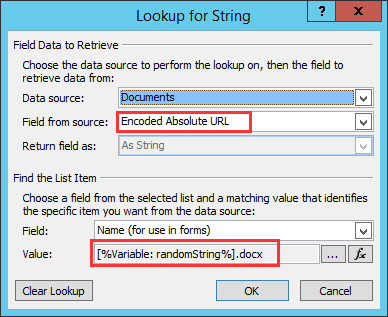
Then the workflow saves the full URL of a personalized document in Email Body Url variable.

To achieve that, we are using a Lookup for string as follows:
After that, the workflow updates the content control fields in a document, based on values from Subscribers list:

Note that Email Body Url variable from the previous action is used here. If you have more than one content control field in a document, you would need separate actions for each of them.
Send E-mail stage of a workflow actually sends a personalized email to the given subscriber.
Since the Subscribers list may contain list attachments that need to be sent together with an email, the first action in this stage gets the URLs of all attachments for the given subscriber:

Then we need to specify the SMTP server that will be used to send emails – in this example, we are going to use Office 365 SMTP server that has smtp.office365.com address:

It is convenient to create a special email account that will be used to send out these emails. Usually [email protected] addresses are used.
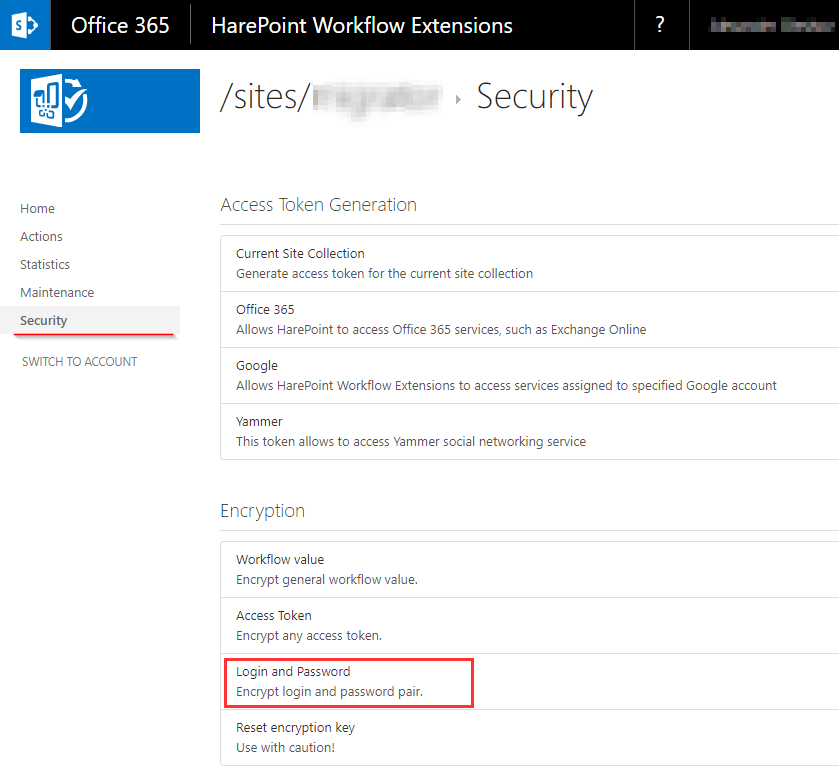
The workflow needs to authenticate to SMTP server. Since for security reasons HarePoint Workflow Extensions for Office 365 do not operate with credentials in plain text, we need to encrypt the credentials of [email protected] account – it can be done in HarePoint Workflow Extensions for Office 365 console:
Site Contents – HarePoint Workflow Extensions for Office 365 – Security – Login and Password
Enter login and password for [email protected] account:
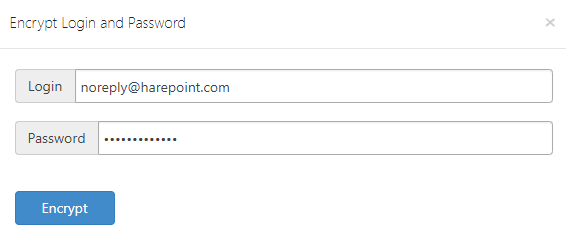
Click Encrypt button, then copy and paste the encrypted token to Set Authentication action; choose to authenticate to an Email server:

Finally, an action to send an email with the body from a Word document, including attachments, to a given subscriber:

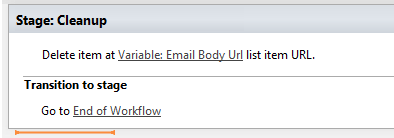
At the Cleanup stage, the workflow removes the personalized document from a document library:
The second workflow: ‘Mail merge initiator’ site workflow
In order to initiate sending personalized emails to multiple subscribers, a site workflow is used. This workflow checks and updates the field Email Sent, type of Yes/No. As soon as the field is updated, the first workflow ‘Send email’ will trigger since it is tied to an item change.
The site workflow uses the special action, available only from HarePoint Workflow Extensions for Office 365 – Loop through and Update list Items, to loop through multiple items in Subscribers list and update them:
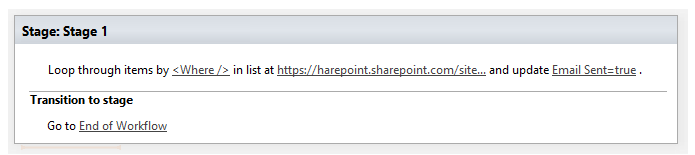
As you can see, this action uses CAML query to choose which subscribers from the list should be affected. In this example, we use the simplest (empty) CAML query that includes all items in a list:
<Where />
Which is equal to
<Where>

</Where>
However, more complex CAML queries can be used to select only specific subscribers by a certain criteria.
Ready to go
Ok, now you can start the Mail Merge by launching the site workflow Mail merge initiator.

In our case, it had changed 17 items in Subscribers list, thus initiating 17 Send email workflow instances for each of those affected items.
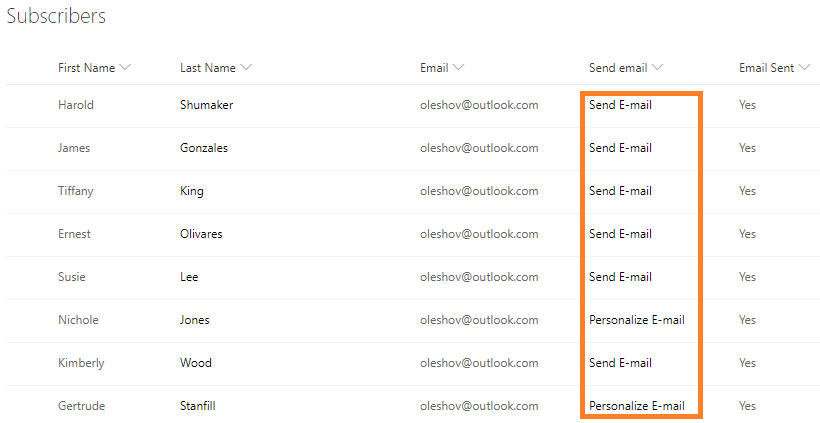
In Subscribers list, in Send email column, we can track the status of Send email workflow for each subscriber:
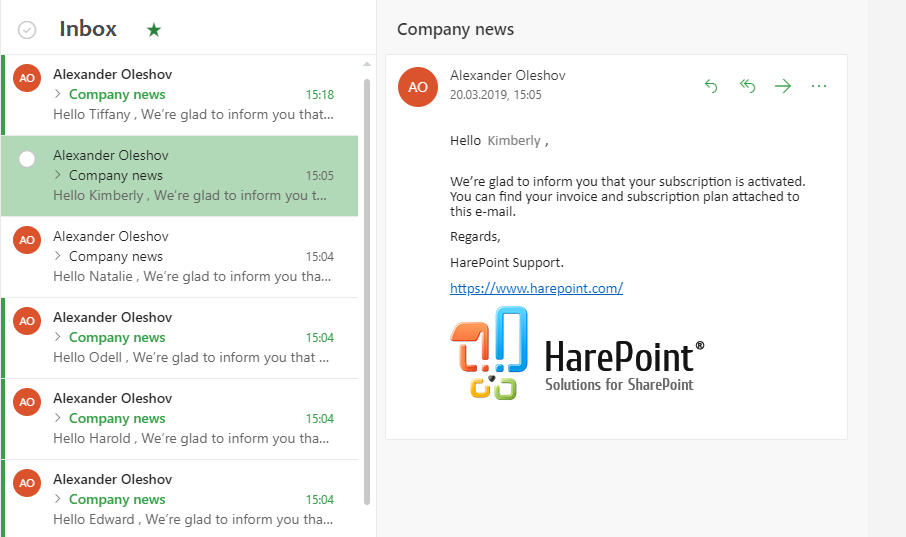
Finally, here is the personalized email received by a subscriber, as seen in a mailbox:
Conclusion
We have created a fully functional Mail Merge functionality in SharePoint using only the native components – a SharePoint list, a list workflow and a site workflow. Such a simple approach became possible thanks to HarePoint Workflow Extensions for Office 365, which provides a simple and elegant solution to any task.
Thanks for sharing this valuable information.
It would be amazing to merge mail into SharePoint. This information will come handy if you are going to give it a try.
Thanks for your comment!
You are welcome to install and try it. Feel free to reach us for any assistance required.
Note, that the mail merge workflow can be created for both SharePoint Online and On-premise environments.