


This workflow example shows you how to get data from an XML file. We will download the XML with currency exchange rates from the European Central Bank and get a list of currencies and their exchange rates. We will convert this information into HTML and save it in Shared Documents. To create this workflow, we will use both SharePoint workflow components and components included in HarePoint Workflow Extensions, because it is impossible to perform some of the actions needed using SharePoint Workflow components alone:
| Component name and type | Set of Workflow components | |
| SharePoint Workflow | HarePoint Workflow Extensions | |
| Send HTTP GET Request (action) |  |
|
| If any value equals value (condition) | |
|
| Transform XML (action) | |
|
| Create document from Text (action) | |
|
The Workflow will work in the following manner:
- Download the XML file with currency exchange rates: https://www.ecb.europa.eu/stats/eurofxref/eurofxref-daily.xml
- Convert XML data into HTML
- Save the HTML data as a new document in Shared Documents on SharePoint
Let’s start creation of the Workflow.
1. Start SharePoint Designer, open the site, point to “Workflows”, click the “Site Workflow” button on the ribbon and type the name of the Workflow. Click OK. An empty workflow is now created.
2. Use the Send HTTP GET Request action from the HarePoint Activities – Network activity group:
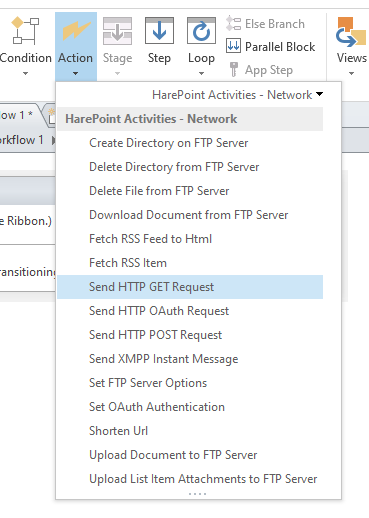
This action allows us to download the required XML file.
Use the XML file URL the first parameter:
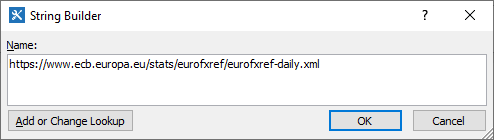
Leave the second parameter unchanged and set two variables:
- response with received XML data
- statusCode to store HTTP response status code
The configured action looks like this:

3. Now we should check the value in the statusCode variable to be sure that the data is received. If the requested data is received, this variable contains the value equal to 200. To verify the value of the variable we will use the condition If any value equals value. Select the variable as the first parameter and type 200 as the second one:

4. Now we should transform the received XML file to HTML. We can do that using the Transform XML action which is located in the HarePoint Activities – Development activities category.
Select the response variable as the first parameter in this action.
The second parameter should include an XSLT request which transforms XML data into HTML. In our example this request looks like this:
<xsl:stylesheet version="1.0"
xmlns:xsl="http://www.w3.org/1999/XSL/Transform"
xmlns:gesmes="http://www.gesmes.org/xml/2002-08-01"
xmlns:cubes="http://www.ecb.int/vocabulary/2002-08-01/eurofxref">
<xsl:template match="/">
<html>
<body>
<table border="1">
<tr bgcolor="#9acd32">
<th>Currency</th>
<th>Rate</th>
</tr>
<xsl:for-each select="//cubes:Cube/cubes:Cube/cubes:Cube">
<tr>
<td><xsl:value-of select="@currency"/></td>
<td><xsl:value-of select="@rate"/></td>
</tr>
</xsl:for-each>
</table>
<xsl:value-of select="//gesmes:name"/>: <xsl:value-of select="//cubes:Cube/@time" />
</body>
</html>
</xsl:template>
</xsl:stylesheet>
The third parameter is the variable in which the HTML code will be saved. When this action is configured it looks like this:

5. Finally, we can save the HTML code into the file. To do that, we should use the Create document from Text action which is located in HarePoint activities – Document Library activities category.

The first parameter is the variable which contains HTML data.
The second parameter is location of the file which should be created. It should also contain a filename. For example: YOUR_SITE/Shared%20Documents/Rates.aspx
Set the “overwrite” option in the third parameter to overwrite the existing file each time the workflow is started.
The workflow is ready. It looks like this:
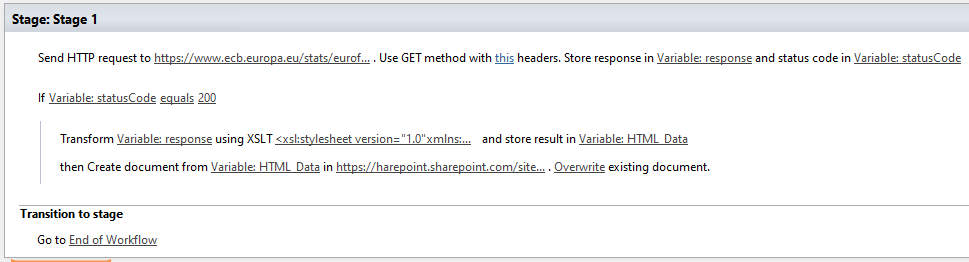
Save and Publish the Workflow.
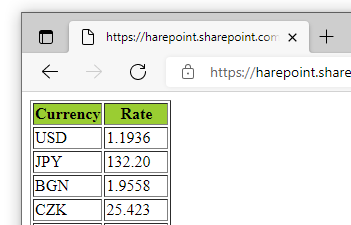
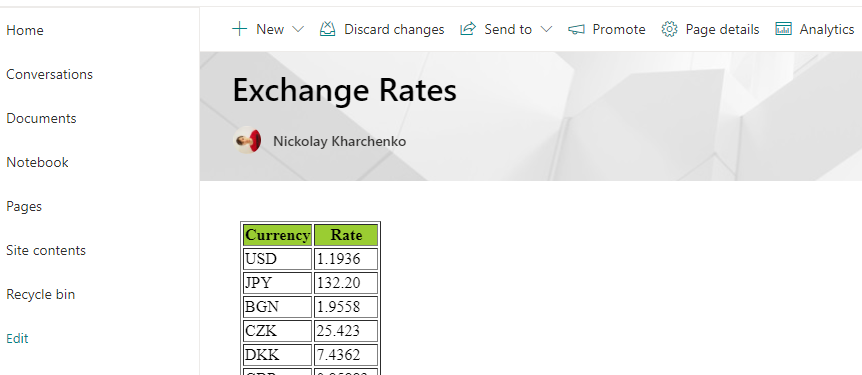
Now, let’s test the Workflow. Open the site where the workflow was published; point to the page “All site content” and click “Site workflows”. Locate your workflow and click on it. Click the “Start” button to execute the workflow. Look at the list called “My completed workflows” and make sure that your workflow has the status “Completed” and that the time of the workflow Start and End is real. Now you can point to Shared Documents and open the file Rates.aspx which was created by the workflow. Verify that the data is displayed properly.
We created a workflow which gets data from a XML file and generates a new page, but you can also create a simple web-part which displays the data on the web part`s page.
You can also watch the whole process of creating such a workflow in this video:
Learn more about HarePoint Workflow Extensions and over 300 new actions to automate any business process without programming.