


- Introduction
- Getting started
- Data Retention Scenario
- Creating a workflow
- Completing Data Retention configuration
- Conclusion
Introduction
In a modern world, Information Management and Data Retention Policies become especially important. It is necessary to have clear policies and procedures on how information is regulated.
SharePoint provides Information Management Policies allowing to keep this under control in an automated way, and when we talk about automation in SharePoint – this is where HarePoint Workflow Extensions can bring automation to a completely new level.
In this article, we will describe a simple example of how HarePoint Workflow Extensions can be used for this purpose. Yet such a simple example can certainly bring you some new ideas of how you can further improve Information Management in your SharePoint environment, especially since the automation capabilities of HarePoint Workflow Extensions are almost unlimited.
Getting started
First, let’s see how Information Management Policy can be enabled and configured in SharePoint.
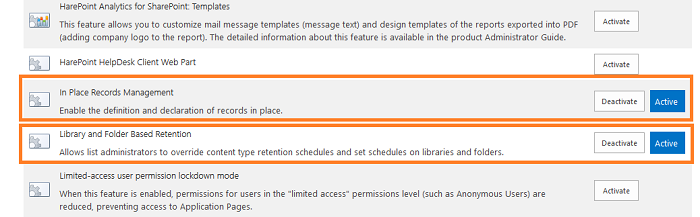
Depending on a template that was used to create a site, Information Management Policy may or may not be available by default. In order to make sure, go to Site Settings of the root site of the site collection. Click on Site collection features.
Two features need to be activated, In Place Records Management and Library and Folder Based Retention:
Now you can go to document library settings (for which the Information Management Policies need to be configured), and click on Information management policy settings option:
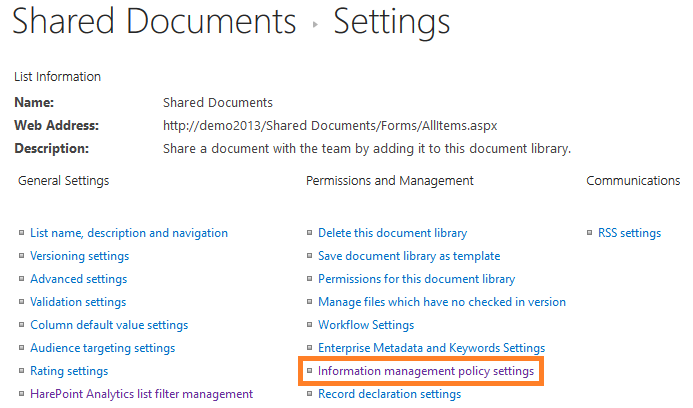
Note that this option will not be available if the two features above are not activated!
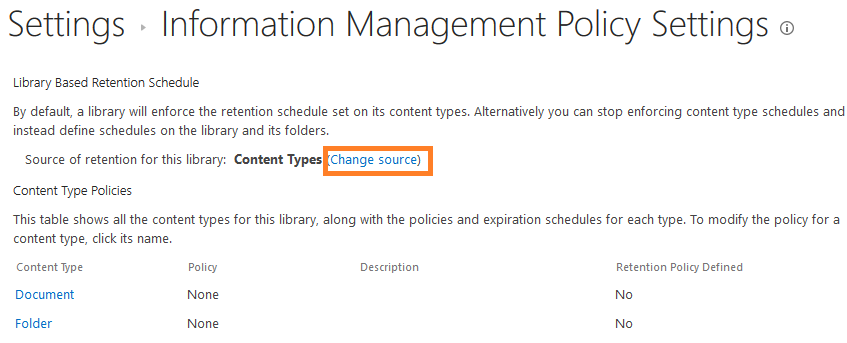
By default, it is set to enforce the retention schedule based on content types. In our example, we will switch it to library and folder based retention.
Click Change source link:
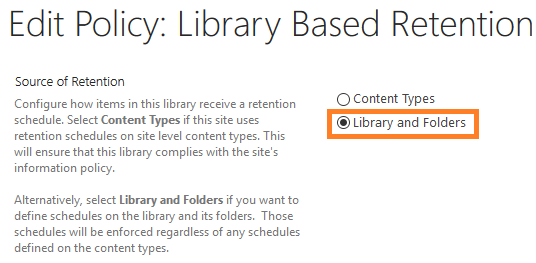
Select Library and Folders:
Data Retention Scenario
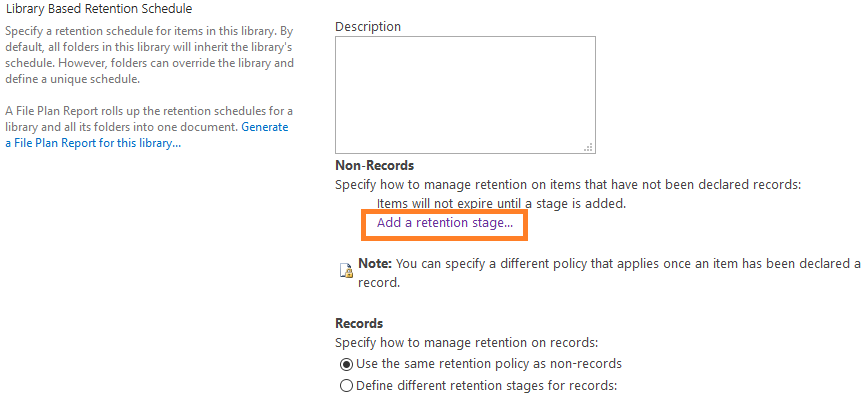
In our example, documents in this library should be updated at least every three months. As soon as three months since last modified date have been reached, a notification should be sent to a person who last modified this document to inform that this document needs to be updated, or it will be automatically moved to Recycle Bin in one month, as this document is considered as “no longer used”.
To achieve such data retention scenario, we would need to add two steps.
Under Library Based Retention Schedule, click Add a retention stage… link to add a first step:
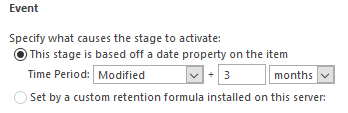
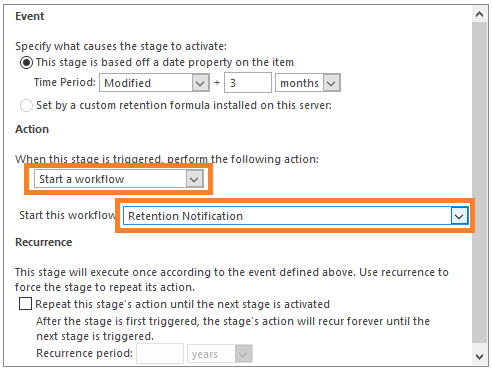
As you can see, there are settings that describe an event – based off which date property this stage should trigger. In our example, the first stage should trigger 3 month after the document has been modified, so select there Modified + 3 months:
Now is the most interesting and important in this article – in the Action section you can choose Start a workflow option:
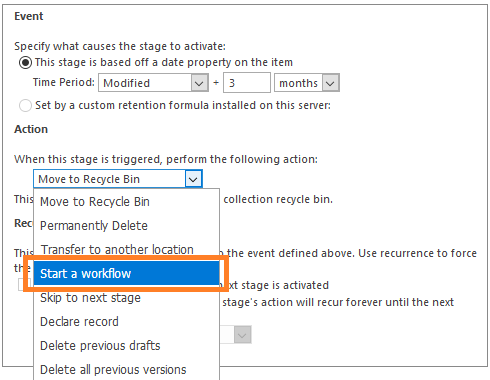
It should be a list workflow associated with this document library.
Creating a workflow
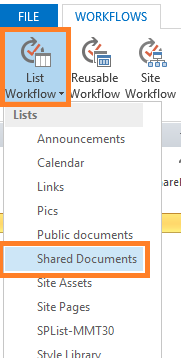
Let’s open SharePoint Designer and create such workflow, called Retention Notification, so that we could select it for this action.
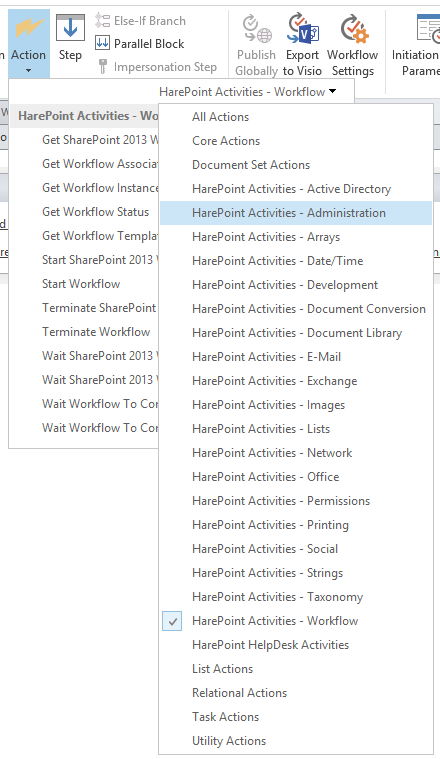
At this stage, since we have HarePoint Workflow Extensions installed, which provides us over 340 custom workflow actions, we can achieve a widest range of possible scenarios.
In this example however, we will only send a custom notification to a person who last modified the document, informing him or her that, this document has not been updated within last three months, and according to company information retention policies, it will be moved to Recycle Bin as an unused document.
First, we need to obtain the e-mail address of a person who last modified the document. It can be done with Get Site User Property action:

Then add Send E-mail without attachments action, as follows:
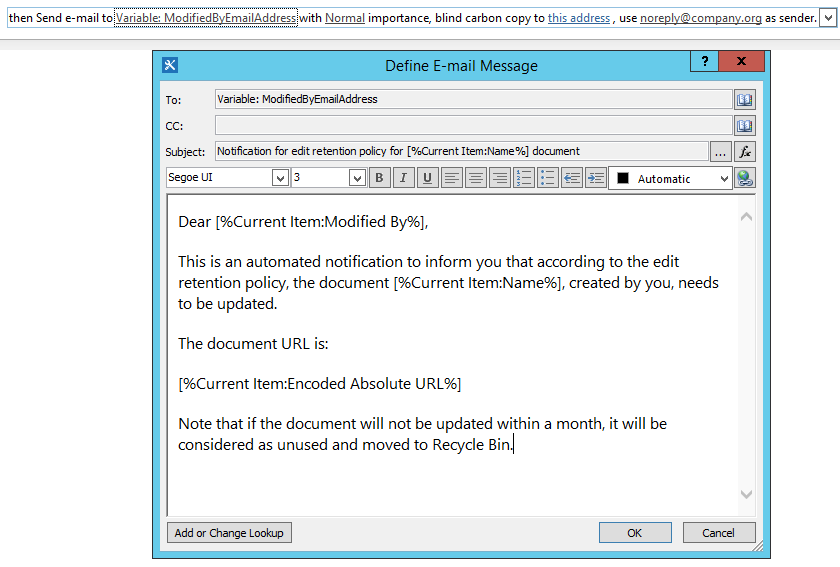
As you can see, several lookups are used to specify recipient’s e-mail address (retrieved by a first workflow action), user name, document URL, and document name.
Of course, with HarePoint Workflow Extensions you can go significantly beyond that: you can retrieve more information about the document or from the document itself, retrieve more data about user, log notifications and actions taken to a separate list, copy or move related documents across the entire farm, include document as an attachment to an e-mail, change document permissions, and many more.
Click to Save and Publish the workflow:

Completing Data Retention configuration
Now, after we’ve created a workflow associated with the document library, we can select this workflow in Action menu:
Click OK and the first Data Retention stage will appear:

Click Add a retention stage… to add a second stage. Configure it to move the document to Recycle Bin after 4 months of inactivity:

This is how Data Retention Schedule finally looks like:

Conclusion
In this article, we have quickly reviewed the Information management policy settings in SharePoint – how to enable and how to configure them, as well as how this mechanism can be used in combination with HarePoint Workflow Extensions for SharePoint to empower it with almost unlimited automation capabilities in SharePoint.